
Move Data Securely with Azure Data Factory
Azure Data factory is a great tool for moving and transforming data between different storage and database mechanisms in Azure.
A common scenario, and one that’s easy to use and setup, is to import data from a CSV file into SQL Azure or CosmosDb. In an on-premise world you could use a BULK import statement to perform this action, however as you move to SQL Azure and need to start hooking into other Azure services can be a bit more complex.
As an overview the process to perform imports in this way is;
- Create a master encryption key for your database
- Create a Database Scoped Credential using a shared access signature generated on your storage account.
- Create an external data source using the scoped credential generated above.
- Perform your BULT INSERT routine.
There are a number of issues with this. The first is that it’s very difficult to debug – because when anything goes wrong the messages you received are not particularly verbose.
The second is one of security. Many companies require services such as storage accounts and SQL Servers to be locked down to only allow access from specific IP addresses or ranges. In addition the use of shared signatures is difficult to maintain as once they expire you must run through the above setup process again with the newly generated SAS in or to re-run an import.
Luckily Azure Data Factory overcomes all these issues for simply data copes, and with the use of Managed Identities or Service Principals, and the ability to specify Trusted Azure services, or even open set ranges for Data Factory, many security concerns can also be overcome.
Let’s walkthrough copying data from a securely stored CSV file into a SQL Azure database using a secure connection and a Managed Identity.
I’m going to assume you’ve already created an Azure Data factory (it’s very simple to do, in the Azure Portal click Create, search for an choose Azure Data factory and follow the wizard).
I’ll also assume you have a Storage account and Azure SQL Database created (again all easily created through the portal using the Create wizard).
Before we create a pipeline, I’m going to make sure my Storage account and SQL Azure databases are all locked down to only allow specific networks to access them. Go to your storage account and change Allow Access to Selected Networks.
I’ve also added my client IP just so that I can view and load data from my computer.
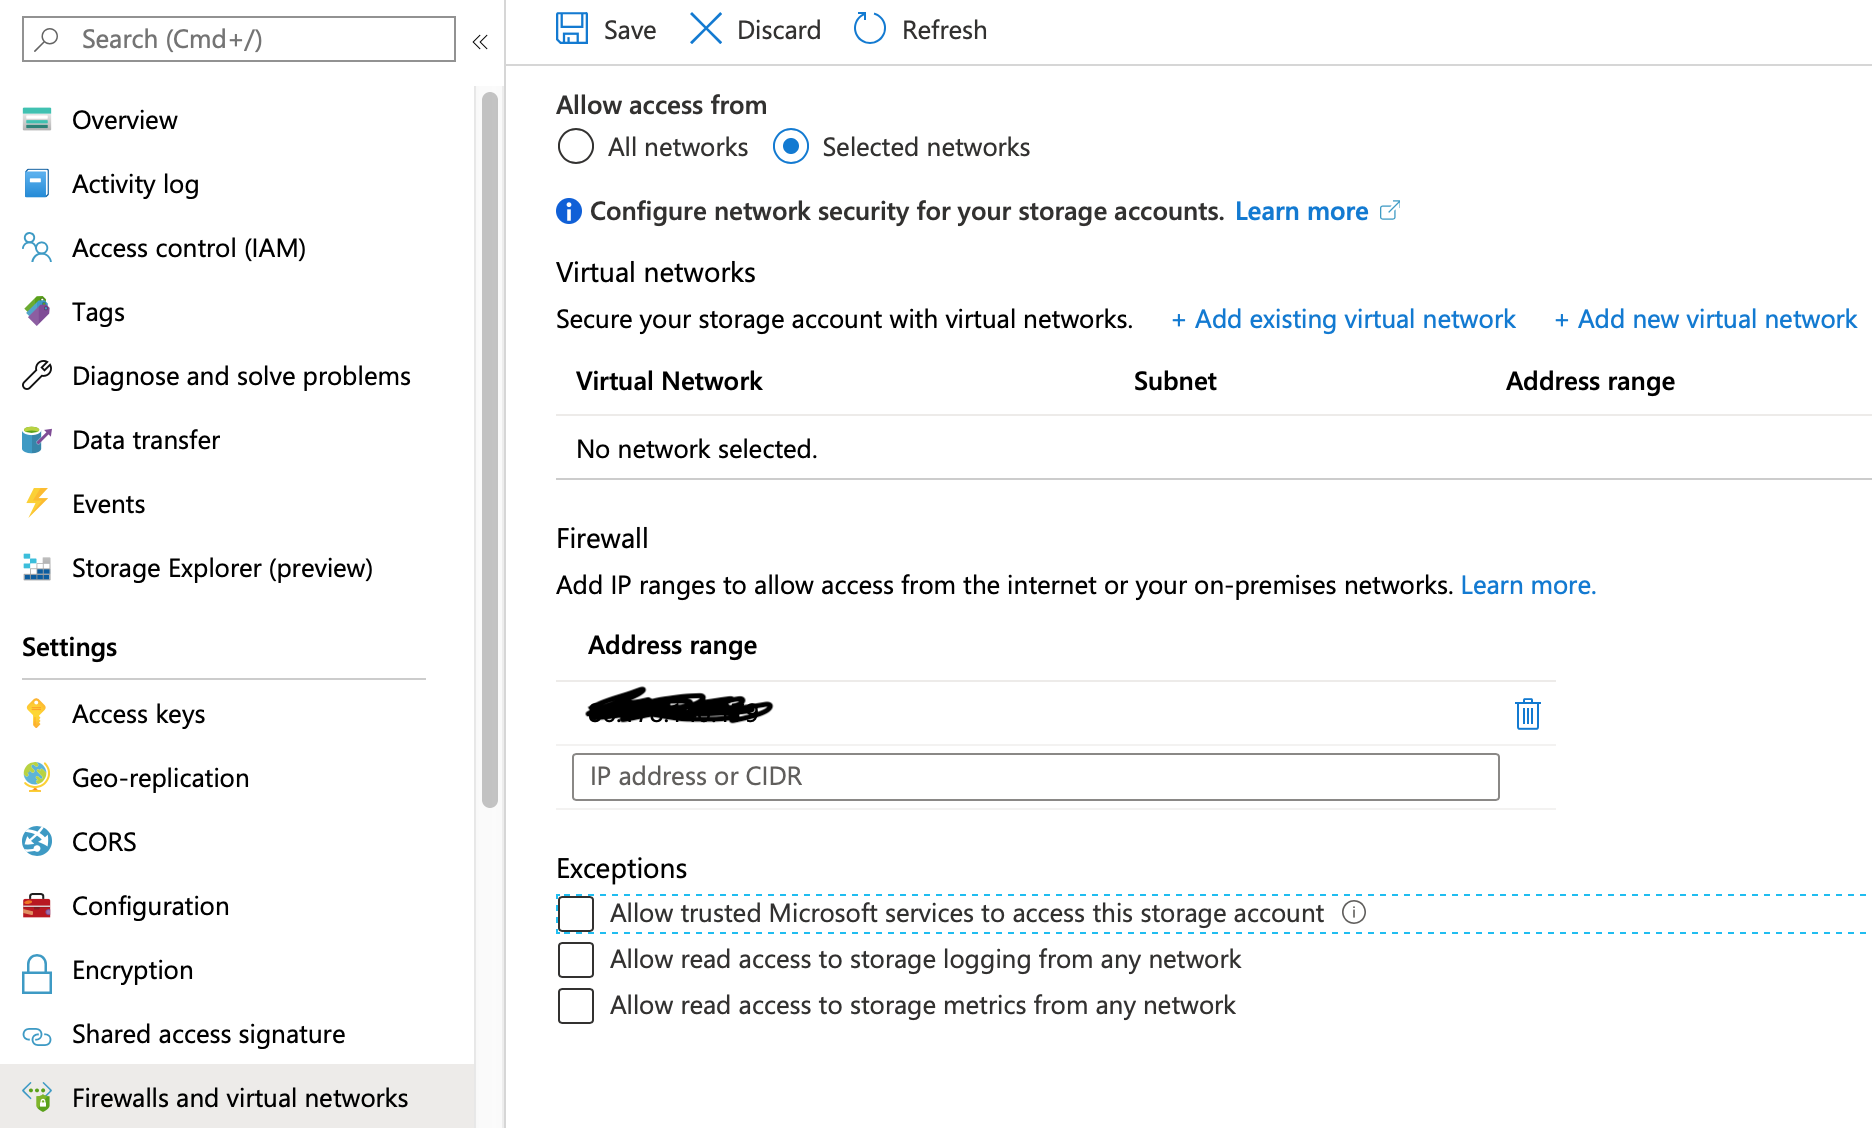
In other words, I’ve basically blocked all access except from my computer.
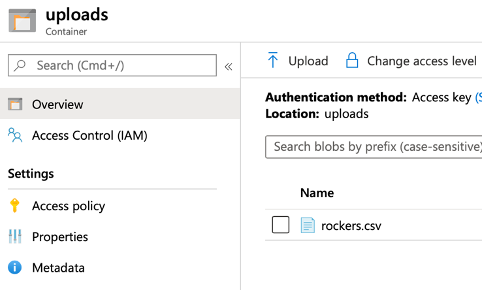
Now I’m going to create a simple csv file and upload it to an uploads container in my storage account. File is a simple text file with the following contents;
Id,FirstName,Surname,DOB
Make sure the file is well formatted – i.e. proper quotes around strings, no spaces between commas etc.
I’ll then upload that to my storage account.
Now I’m going to go my Azure Factory by browsing too
You’ll be asked to select your subscription and your data factory.
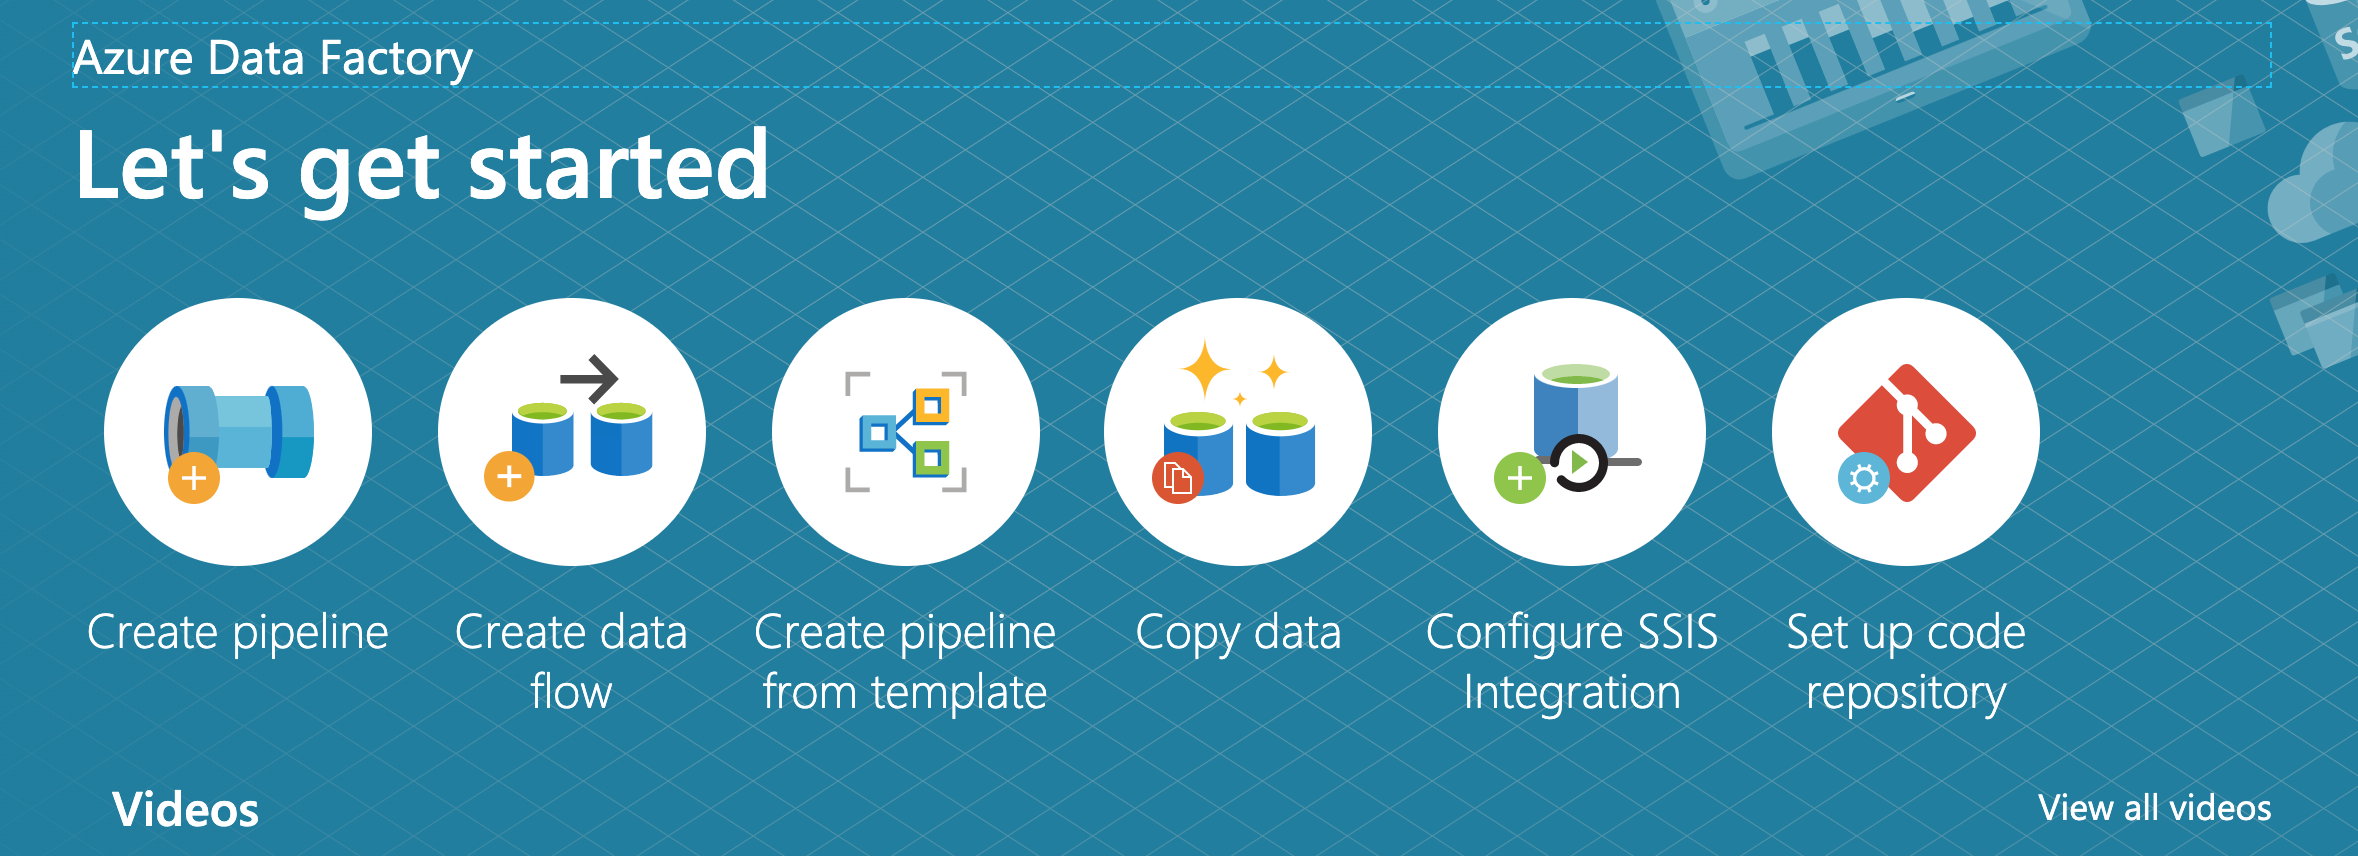
The first time you sign in you’ll be presented with a Welcome screen – click ‘Create a Pipeline’
What we want to do first though is create a couple of Connections. Connection define how we will connect to our source and destination endpoints – so we’ll want one for our Storage account, and one for our SQL Servers.
Down the bottom left you will see an option for Connections and Triggers – click Connections.
At the top of the new pane is a +New button – click it.
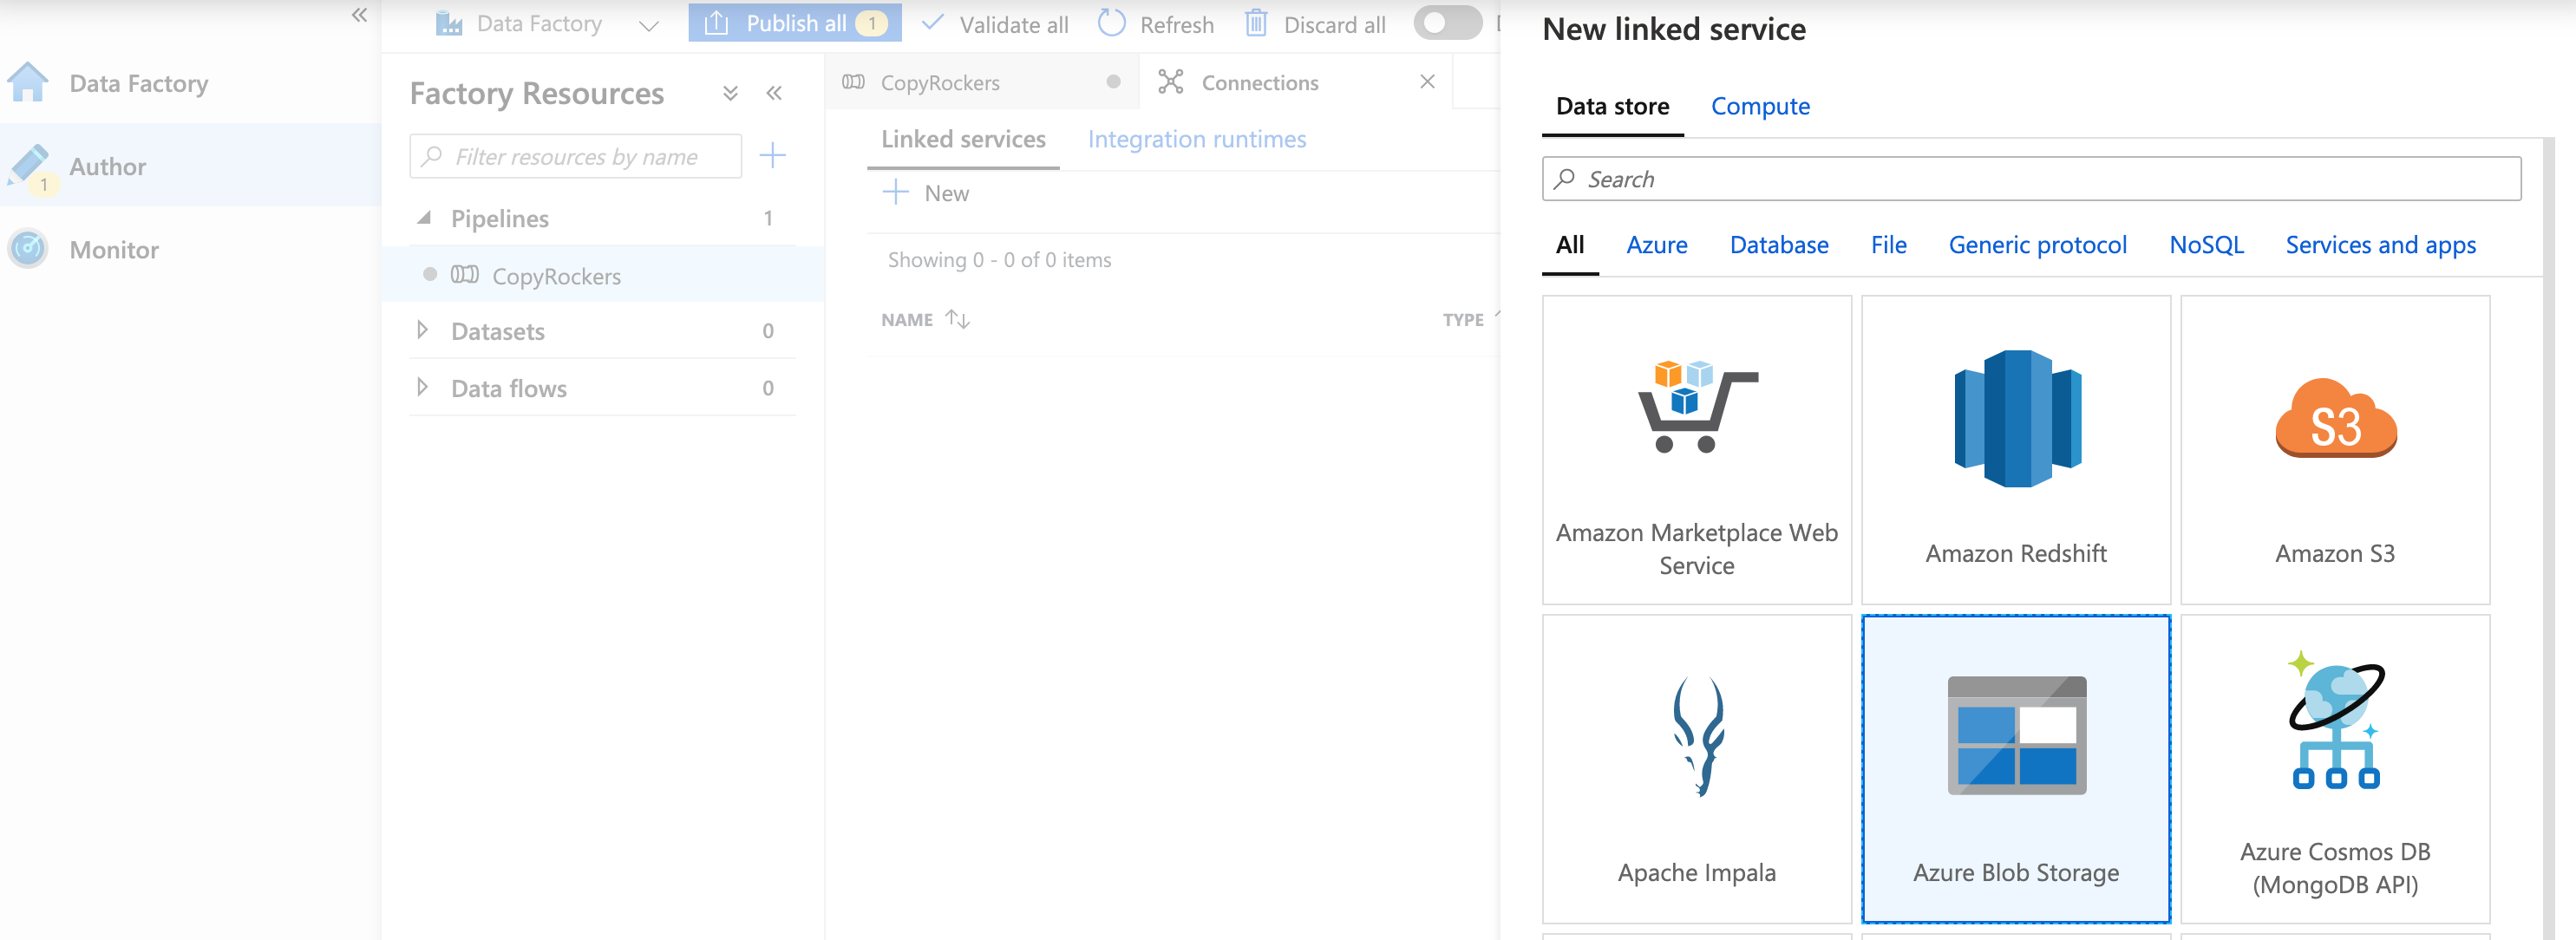
Select Azure Blob Storage.
Fill in the details – give it a name, set Authentication Method to Account Key, then select the storage account in the options that appear. Finally, at the bottom click ‘Test connection’. It should fail, and if you then click more it will tell you the connection is forbidden.

We need to do two things to get access – first we need to open the firewalls to allow ADF access to our account, and secondly we need to setup a Managed Identity to access it.
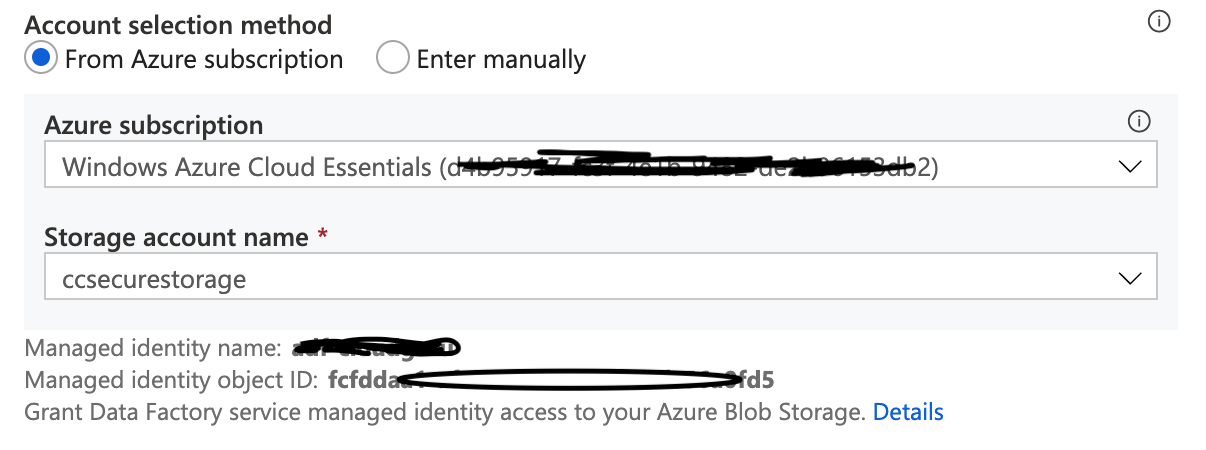
First, change the Authentication Method to ‘Managed Identity’ – you’ll need to select the storage account again. However it will now show you the name and Id of the ADF Managed Identity that your ADF is using.
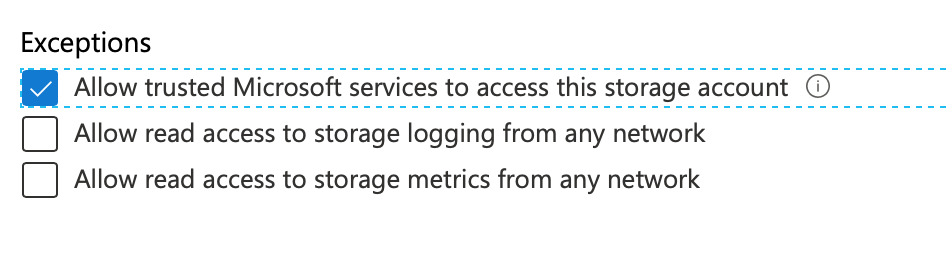
Now switch back to the Azure portal and go back to the Firewalls settings for your storage account. Click the tick box ‘Allow Trusted Microsoft services’ and click Save. This rule allows certain Microsoft hosted and managed services access to your storage account – for details of those services click here https://docs.microsoft.com/en-gb/azure/storage/common/storage-network-security#exceptions
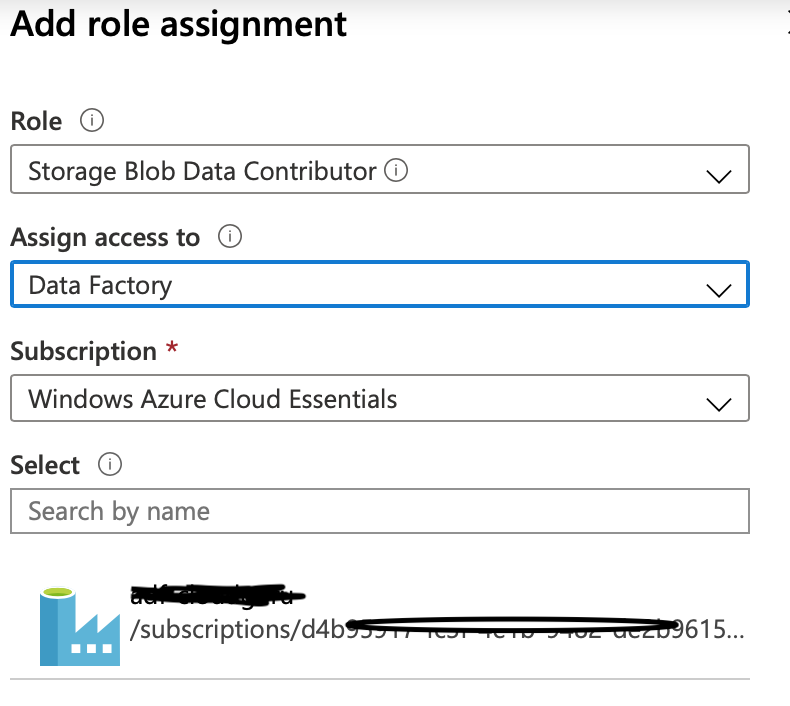
Now, still on your Storage Account, go to the Access Control (IAM) pane. Click Add a Role Assignment. Set the role to Storage Blob Contributor, set Assign Access to as Data Factory, select your subscription. Select the Managed Identity that appears and click Save.
Switch back to the Data Factory portal, and click the Test Connection button again – the connection should now be successful – click Create.

Next we want to setup a connection to SQL Server. This time we’ll setup access to our SQL Server. In the Azure portal go to your SQL Server and again go to the firewall blade.
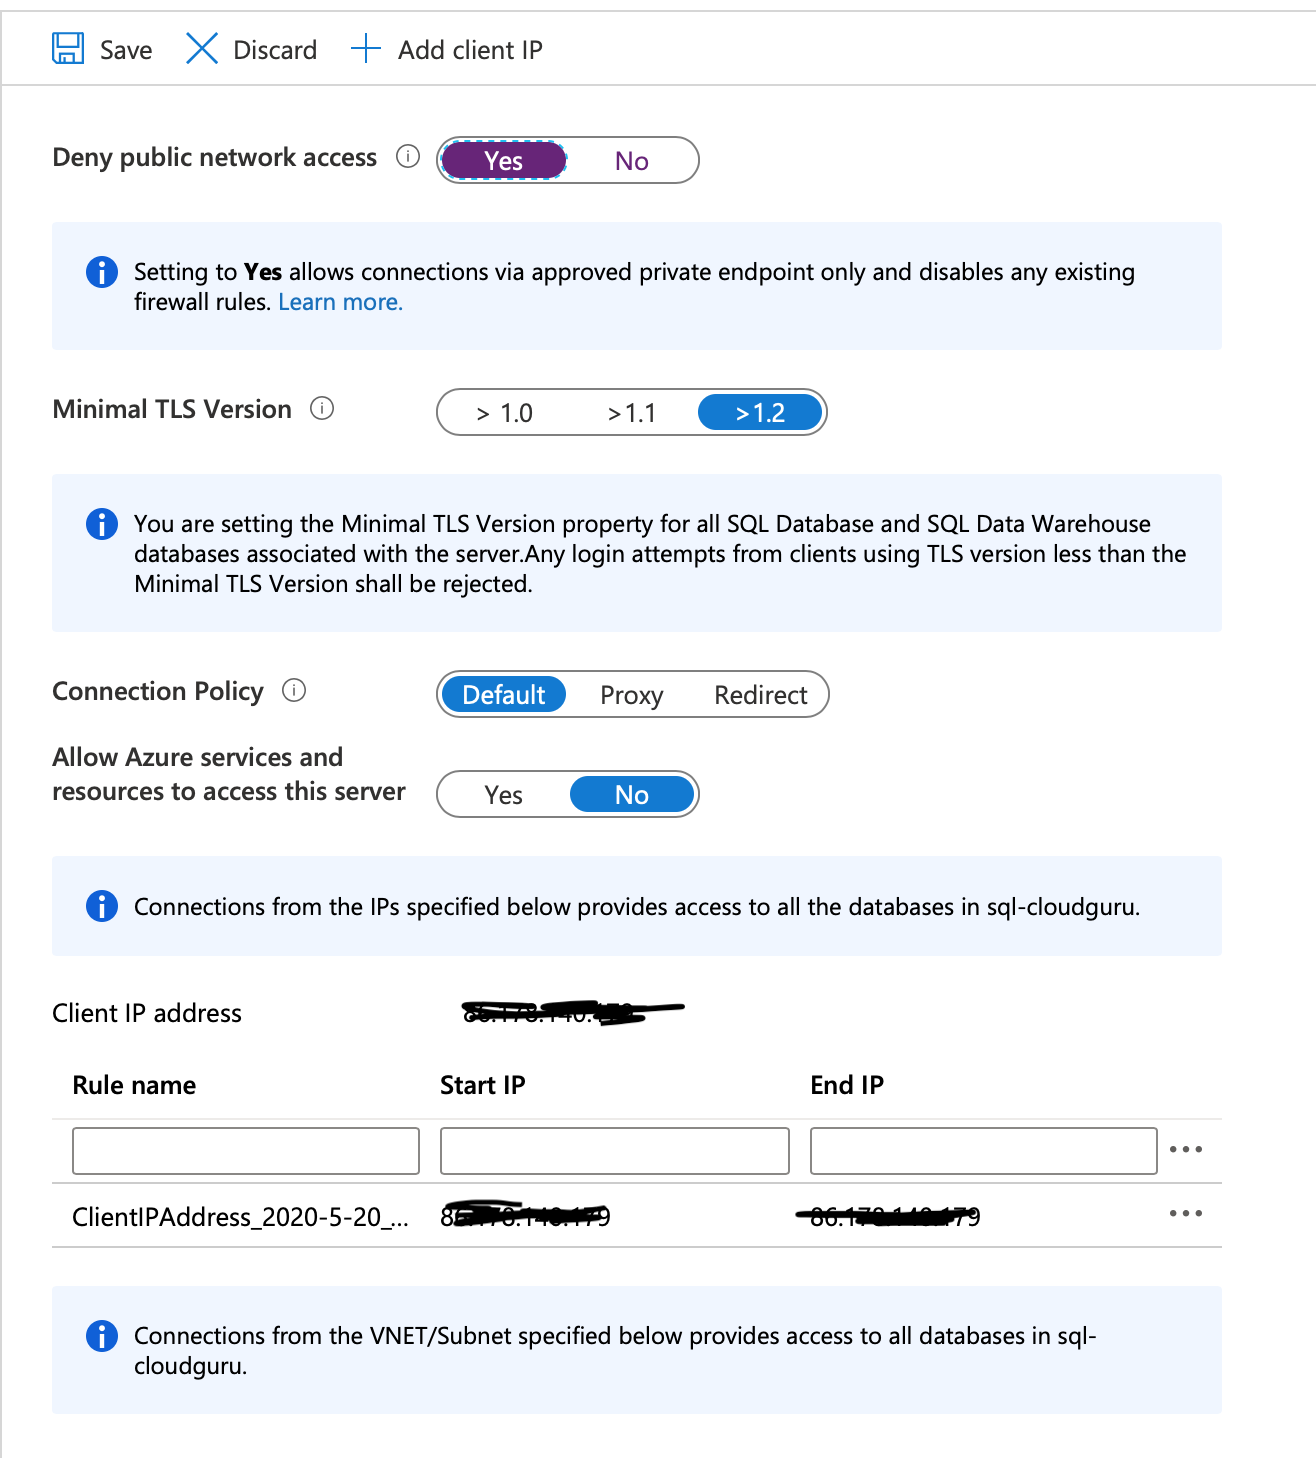
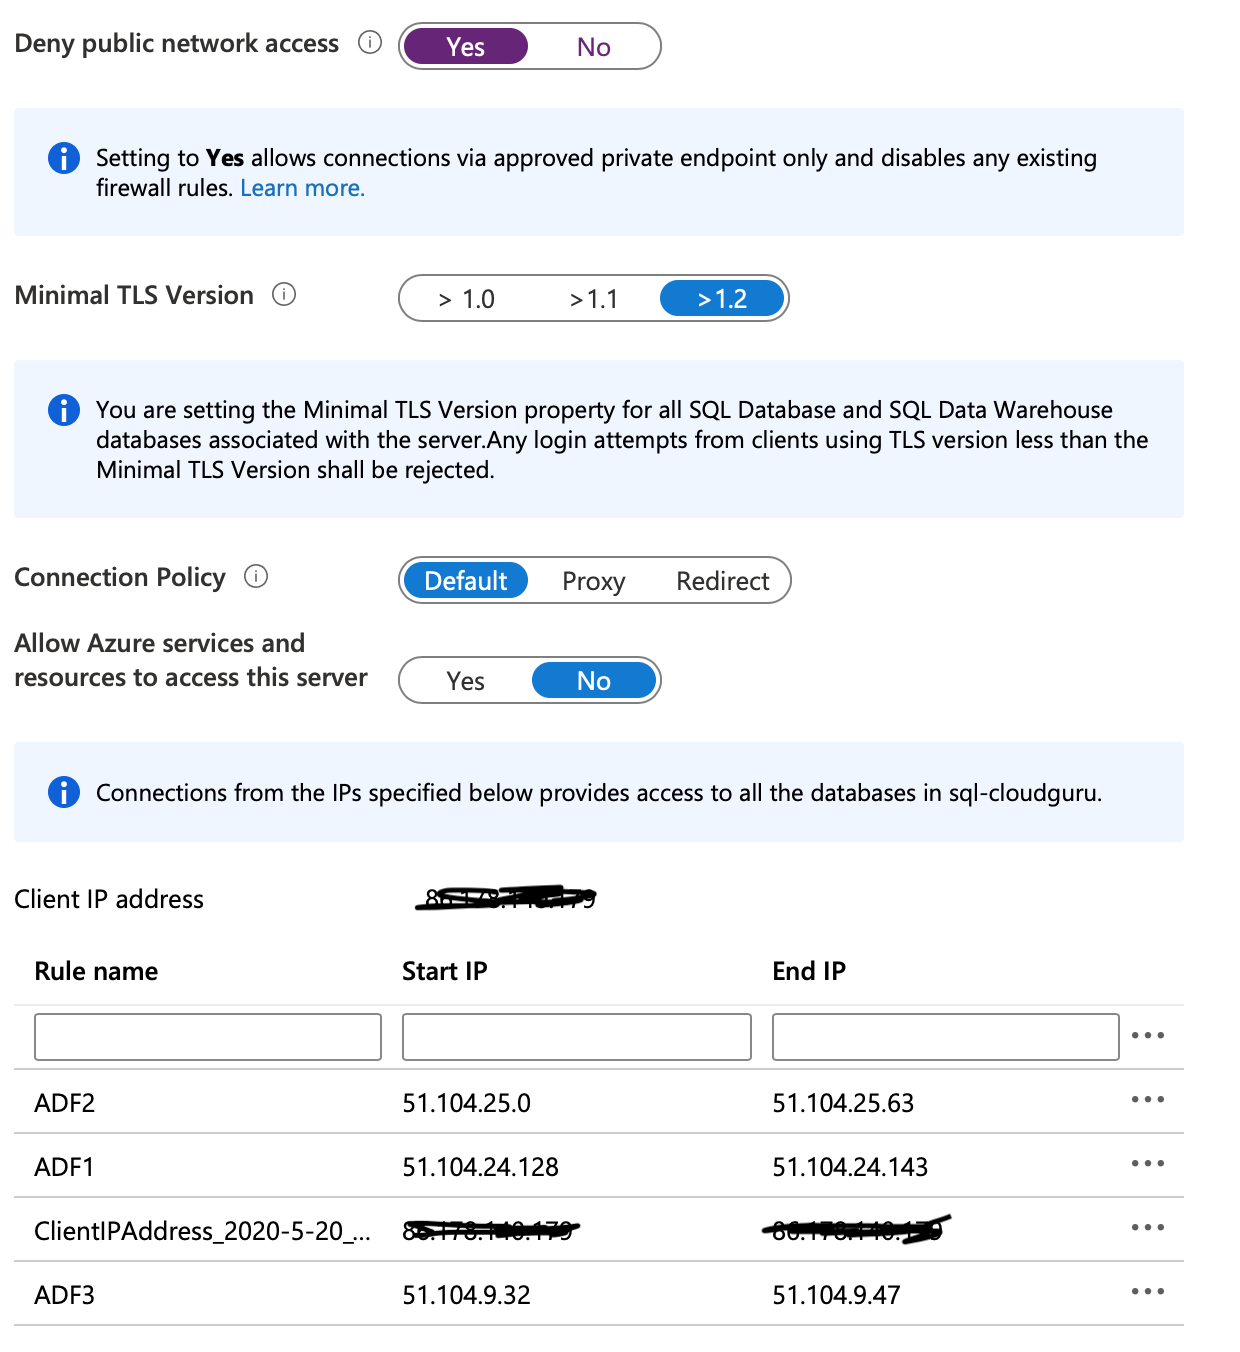
First we need to set the ‘Deny public network access’ to yes. However I’m also going to add my Client IP so that I can still logon from my computer.
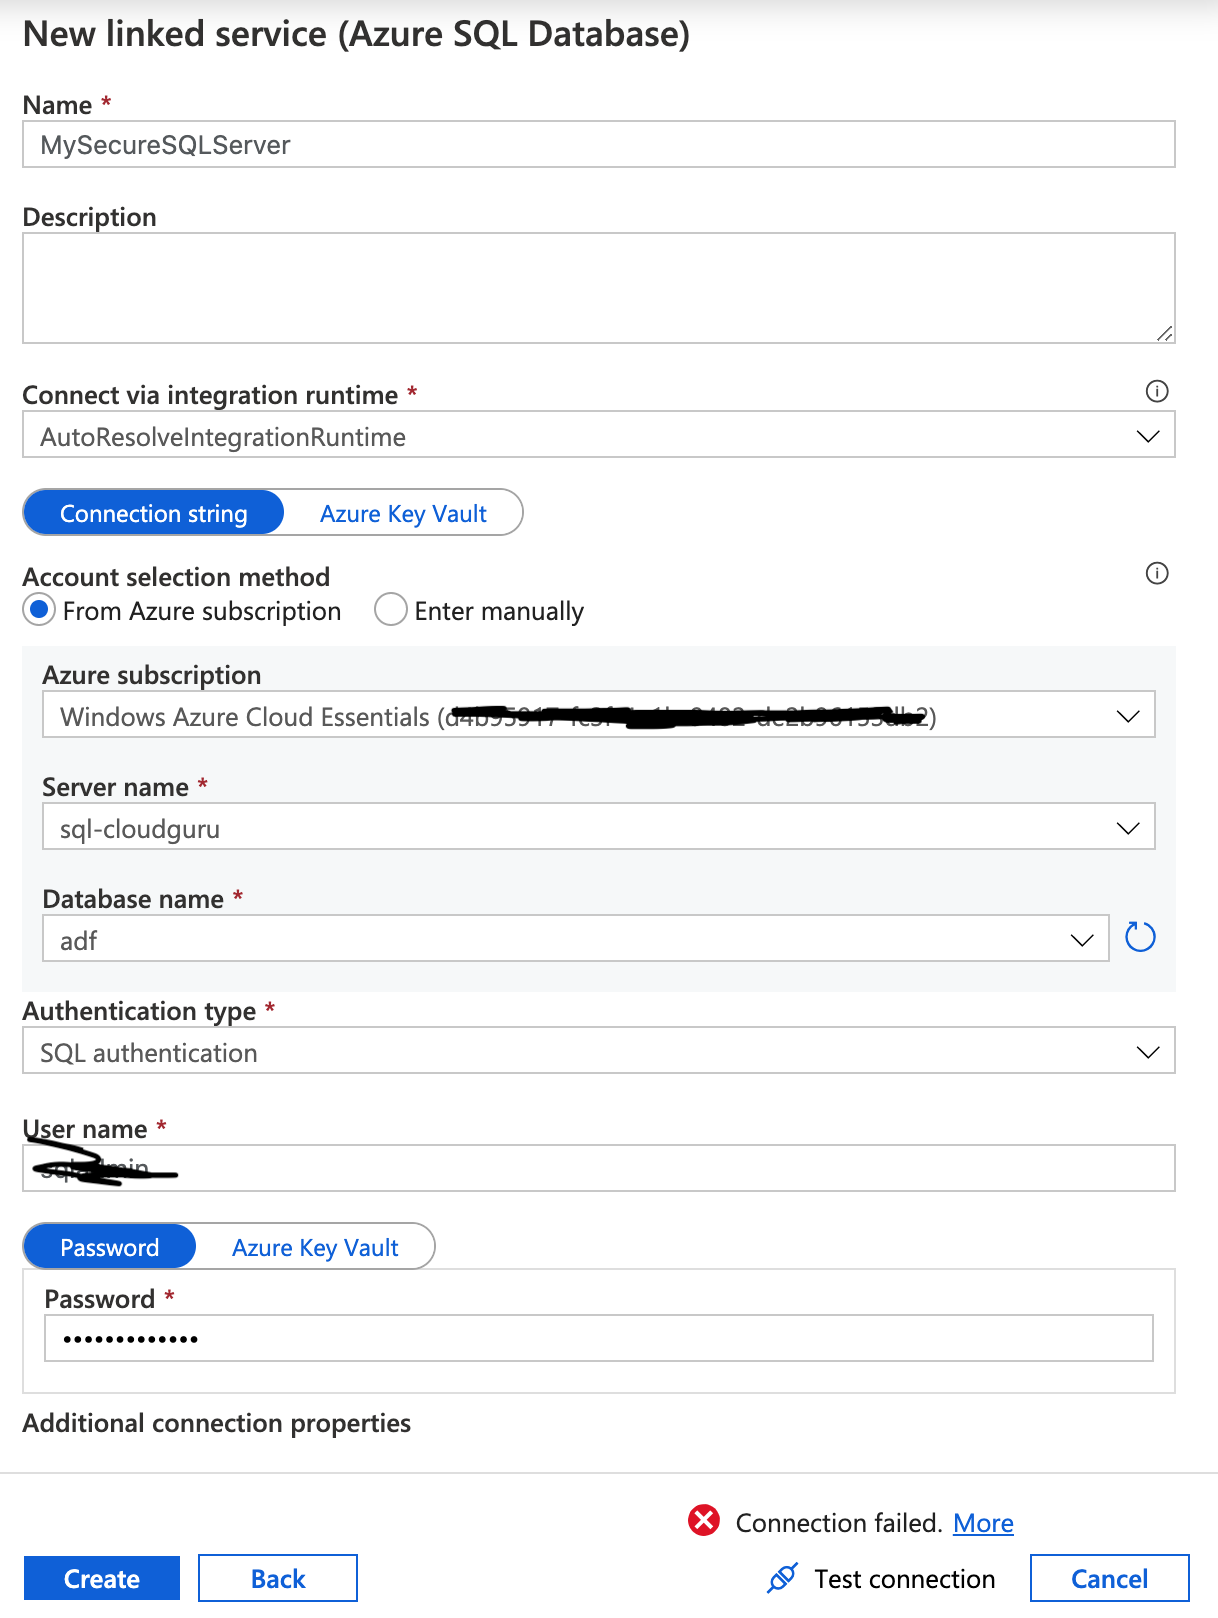
Now go to the Data Factory and confirm access is blocked. In the Data Factory go to Connections as before, click +New and choose Azure SQL Database.
As with the storage account fill in the details and select the sql you want to connect too. For now choose SQL Authentication and use the sql username and password you used when creating the SQL Server (or some other user if you’ve set one up). Again, click Test Connection and it should fail.
Now let’s open things up. Go back to the Azure Portal, into your SQL Server Firewalls blade.
You’d be forgiven for wanting to choose the option ‘Allow Azure services and resources’ – and although this would work, the problem is that this does NOT only allow trusted Microsoft services such as ADF, it actually opens your SQL Server to the ENTIRE Azure network- this means ANY service, be it your own or another Azure customer could get network access to your SQL Server! You could argue the authentication will secure you, but for many companies this is simply not good enough.
Instead, what we can do is open the specific IP ranges for ADF – these are broken down by region and can be found here;
https://docs.microsoft.com/en-gb/azure/data-factory/azure-integration-runtime-ip-addresses
Choose the region that you built your data factory in.
The addresses are listed as CIDR ranges, and we need to enter them as start-to-end. So we need to convert the CIDR ranges.
Basically the /2x notation tells you how many address to add on to the starting ip - /25 is 128 address, /26 is 64 address and /28 is 16 addresses.
Thus, if we take UK South as an example – the ranges are:
51.104.24.128/25 is 51.104.24.128 to 51.104.24.143
51.104.25.0/26 is 51.104.25.0 to 51.104.25.63
51.104.9.32/28 is 51.104.9.32 to 51.104.9.47
If you can’t be bothered doing the math you can use this handy tool here
https://mxtoolbox.com/subnetcalculator.aspx
Once you’ve worked out the ranges add them to the Client IP address and click Save.
Next we need to grant access to our managed Identify. Again, this is different to storage – we need to grant access to the database, not the Azure Portal – therefore we don’t use the Azure Portal to do it, we need to create a SQL Login using T-SQL.
To do this, we first need to set our SQL database to use an Active Directory Account.
In Azure Portal, still on our SQL Server, select the Active Directory Admin blasé. At the top click Set Admin, and then choose and Active Directory account (note, this has to be an Active Directory account linked to your Azure Tenant for example an Office 365 account – you can’t use a guest account or ‘hotmail’ account). If you don’t have one, you’ll need to create yourself an AD account within your tenant.

You now need to connect to your SQL Server from a tool such as SQL Studio Manager, or Azure Data Studio. Connect to the SQL Server using the Domain Admin credentials you just set.
You need to run a query against the database – NOT the master database.
First you create an External Provider login, and use the Managed Identity you used earlier when setting the IAM role for the storage account – e.g.
CREATE USER [adf-cloudguru] FROM EXTERNAL PROVIDER;
Next you add that user to a database role – for simplicity I’m using db_owner, but you should use least privalidge.
ALTER ROLE [db_owner] ADD MEMBER [adf-cloudguru];
With that done, we can go back to our Azure Data Factory, tell the conneciton to use Manageed Identify and retry the connection.
Hopefully this will now be successful, and you can Create the connection.
Before we go onto the creating our pipeline I’m we need to create a Table to import our data into. So go to your SQL Editor (SQL Management Studio, Azure Data Studio), and create a Rockers table in your database:
CREATE TABLE [dbo].[Rockers](
Once done, go back to the Azure Data Factory.
To effectively ‘save’ anything in ADF you need to publish it – so at the top of the page click the Publish all button. You’ll be shown the changes you made – click publish again.
With our connections setup we can go ahead and create our actual copy pipeline.
To the left of the screen, you see Factory Resources, with Pipelines, Datasets and Data flows underneath – click the + to the right of the filter box between the menu heading and Pipelines – then choose Pipeline from the tear off menu.

Call it CopyRockers.
To the left is now a list of avtivities – we want the top one, Move & Transform. Expand that menu then click and Drag Copy Data over to the workspace on the right.
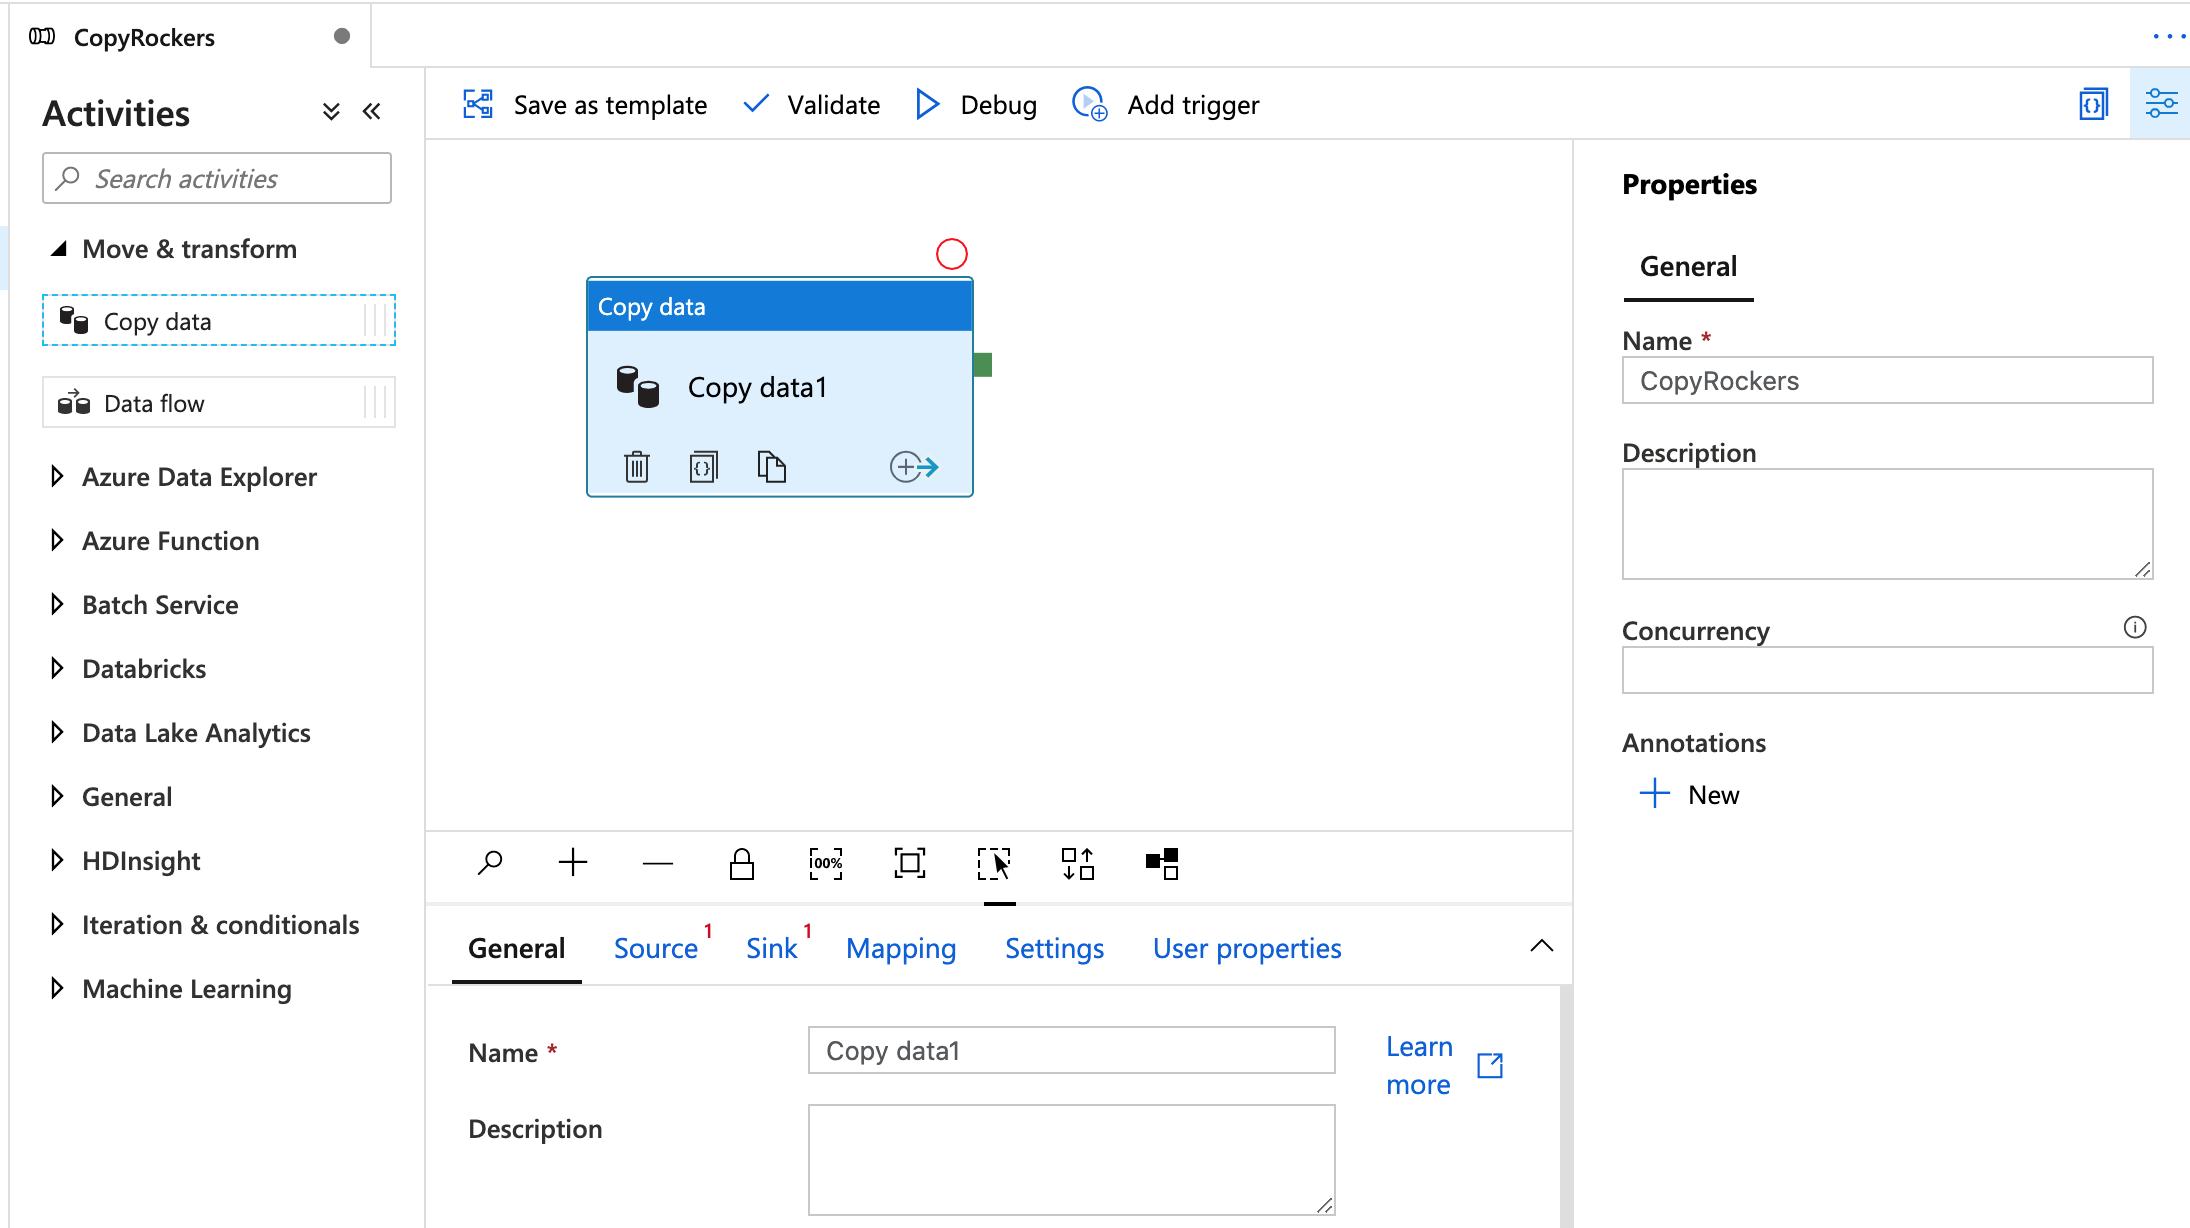
Give the Copy Data Activity a name, then click the source tab.
The source has a drop down list to select a dataset – but it’s empty, so click New.
A screen similar to the Connection window appears – select Blob Storage and continue. Then select Delimited and continue.
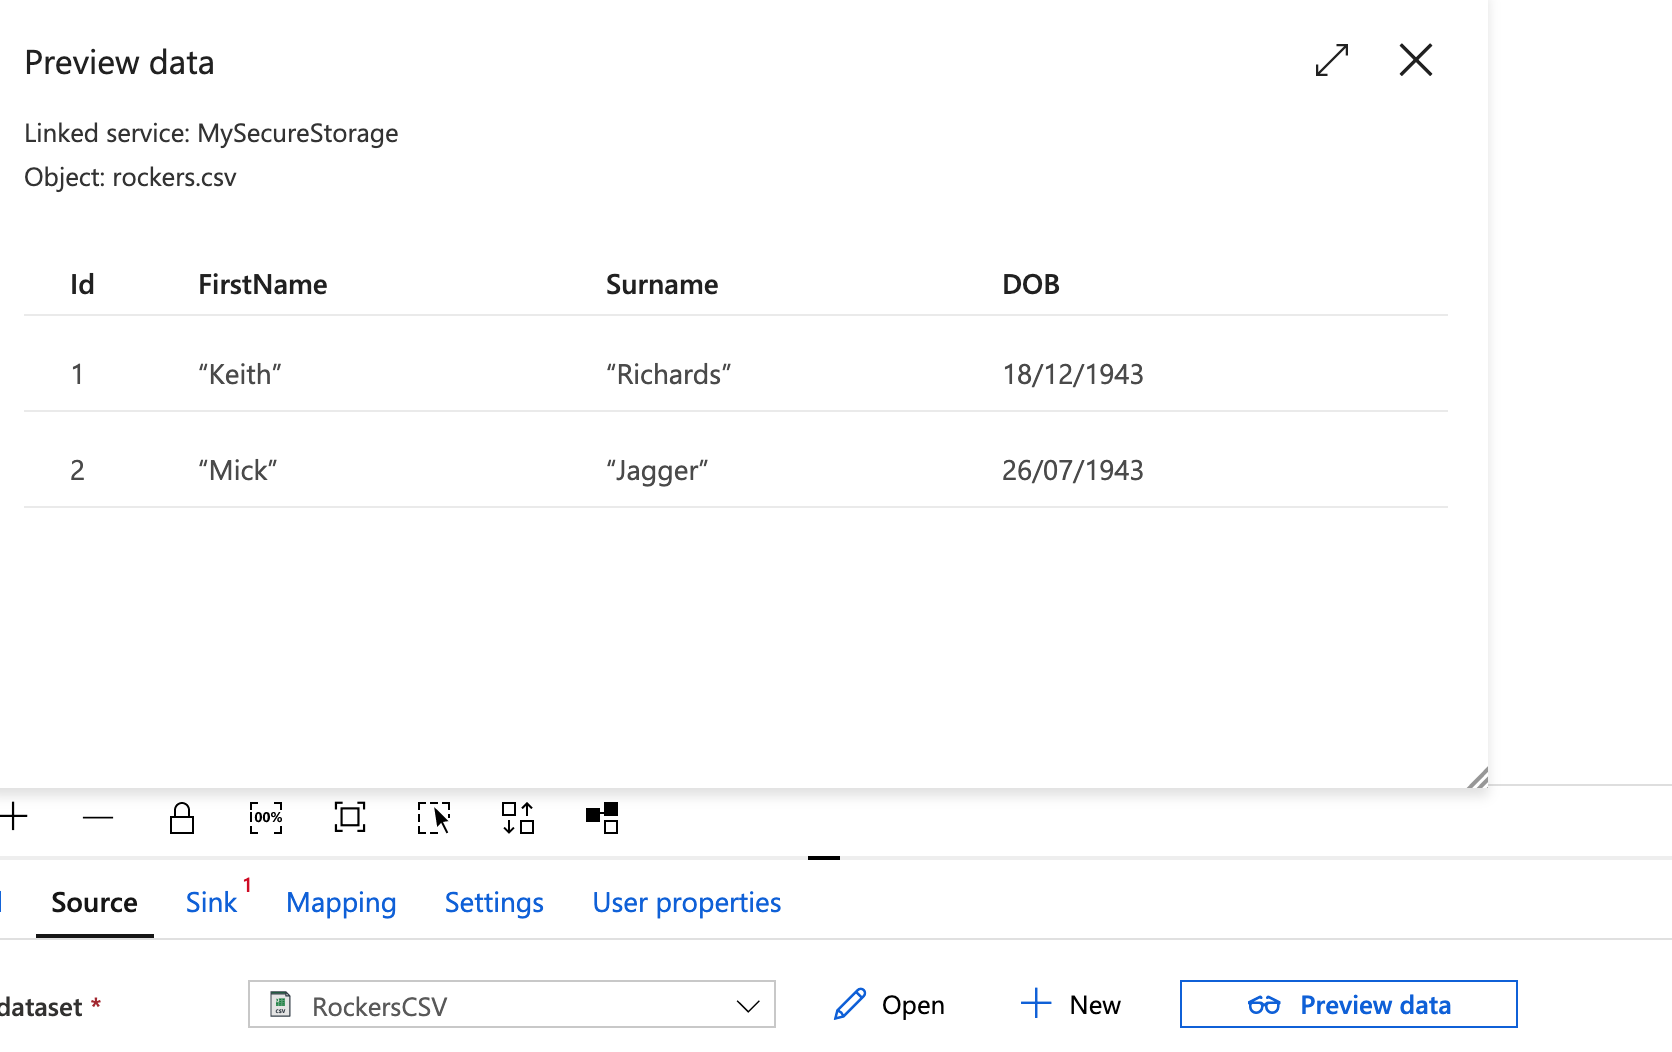
In the next window give our source a name, call it RockersCSV, in Linked Service select the MySecureStorage account we created earlier. The click the Browse button and navigate to the file we uploaded earlier. Finally tick the ‘First row as header’ checkbox.

Click OK.
You’re taken back to the main screen, and there is a now a button the Preview Data – click this to make sure it loads the file OK.
Now click Sink.
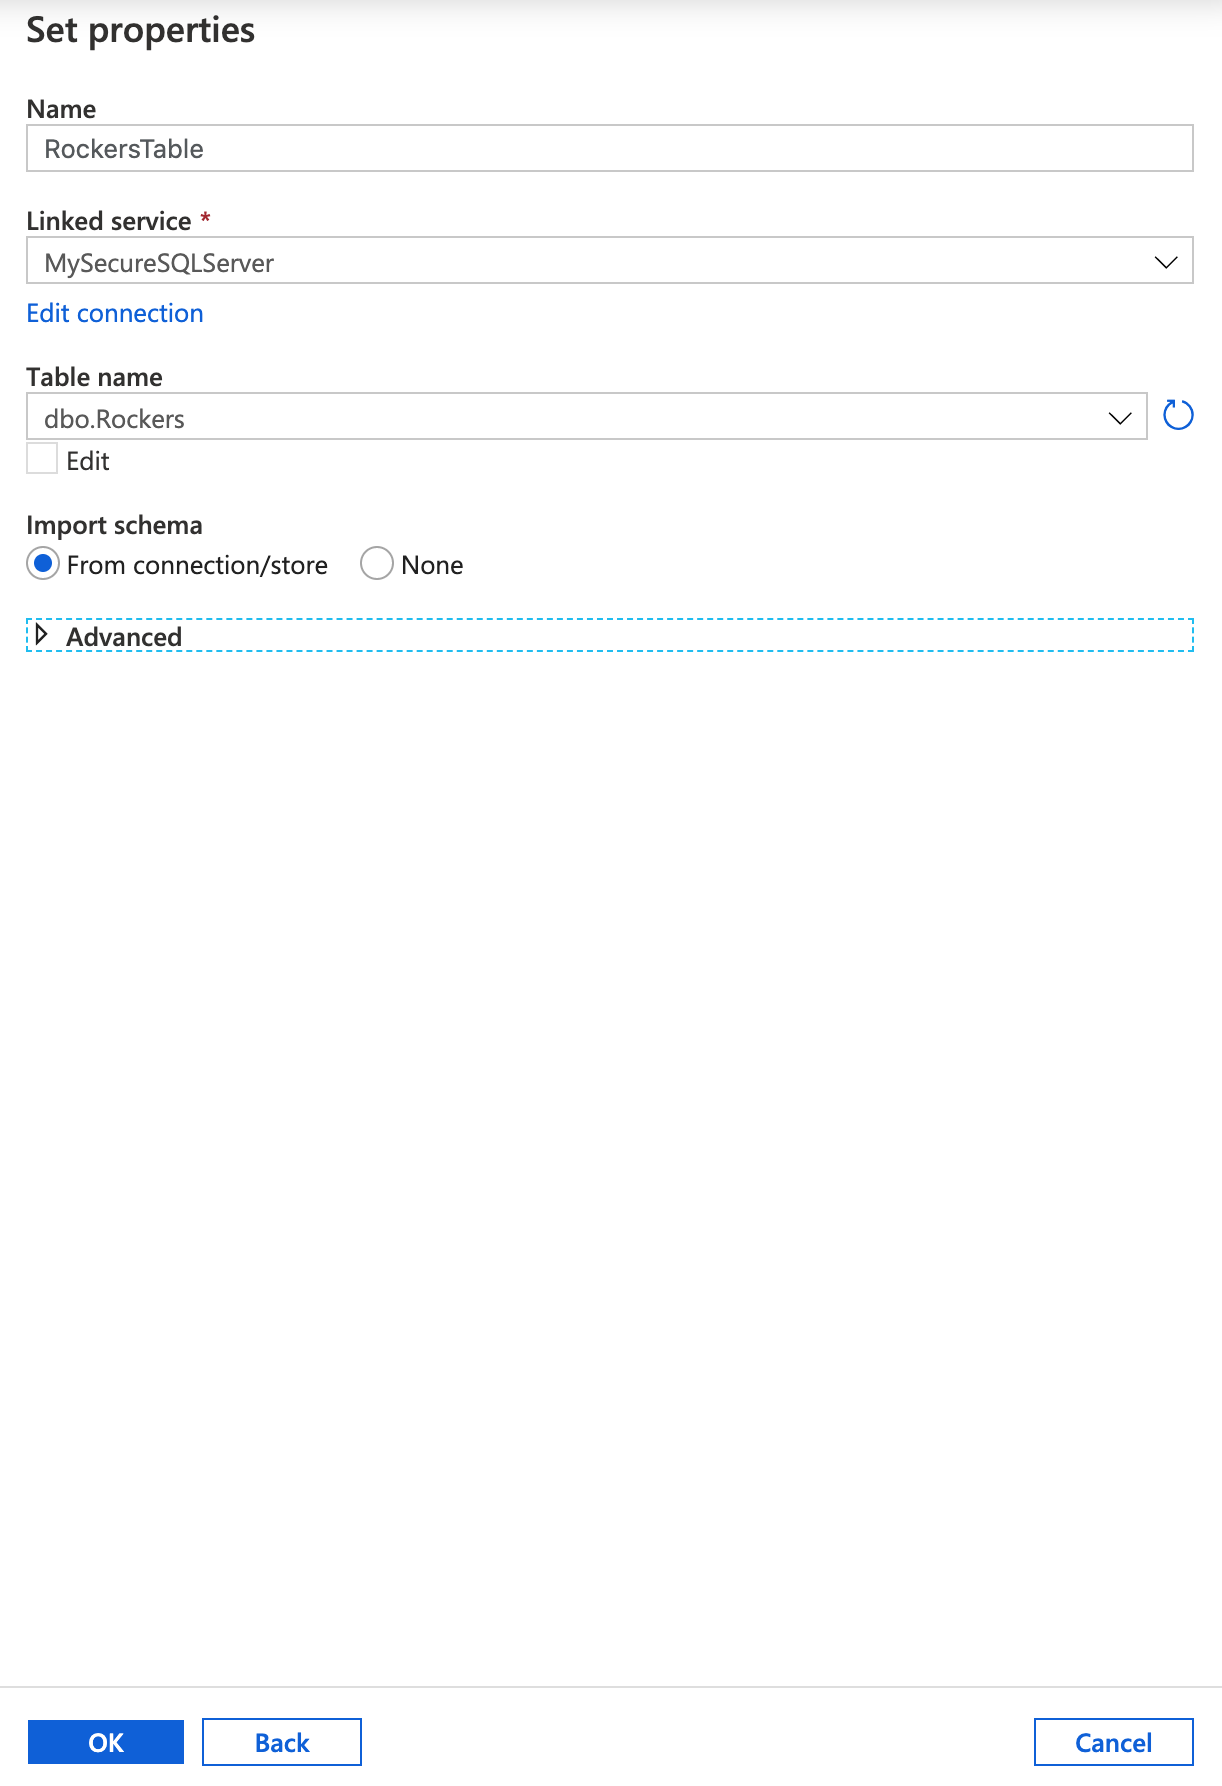
As with the Source, we need to create a new Sink – this is our destination. Click Add, and Select Azure SQL Database from the options.
Call it RockersTable, for the Linked Service select MySecureSQLServer connection you created earlier, then select the rockers table from the drop down list. Ensure Import Schema from Connection/store is selected.
If you table isn’t listed it’s because you need to create it – so go back to earlier in this post and create the table using the supplied script.
Once everything is setup click OK.
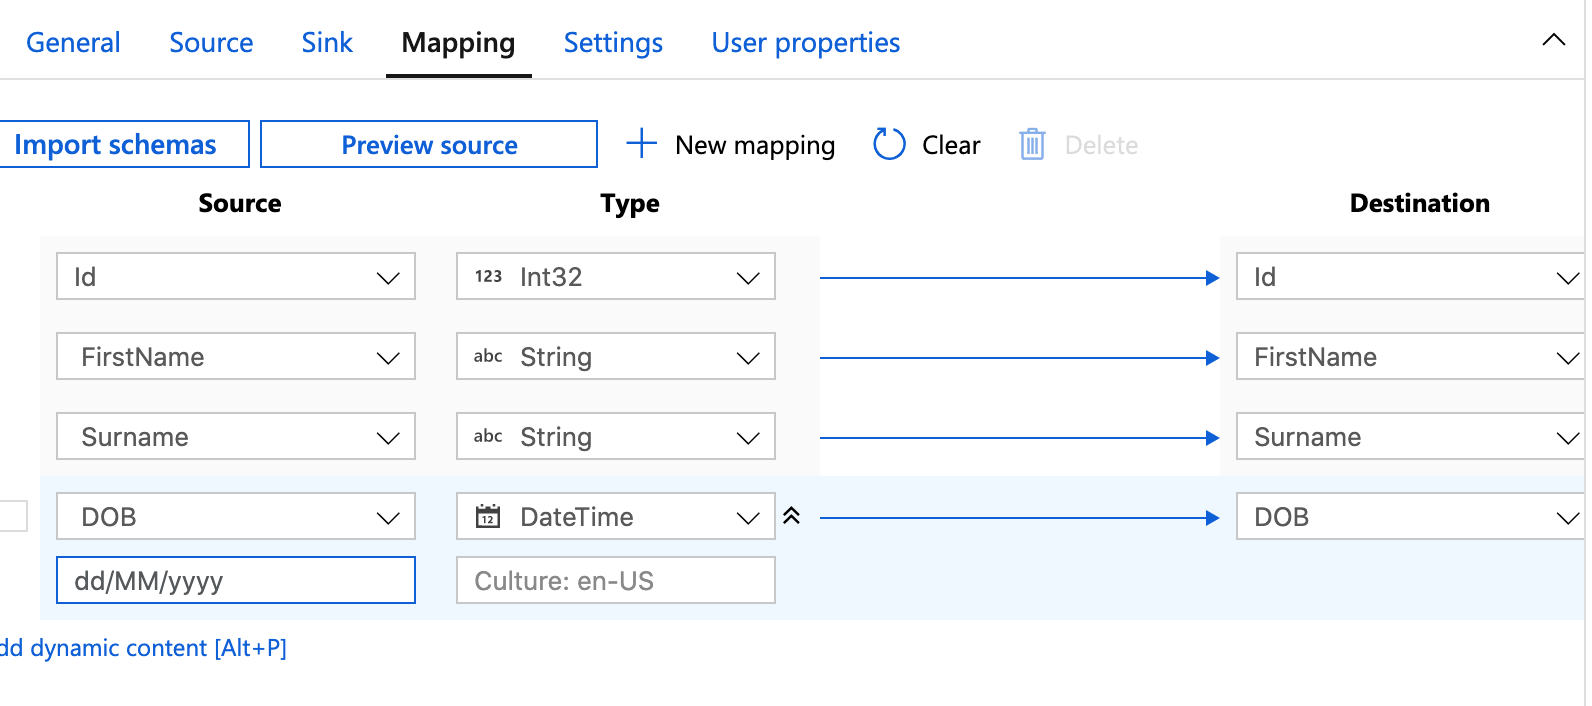
Now click Mapping.
This screen allows us to map our source and destination fields. Start by clicking Import Schemas – this will then attempt to match up the fields automatically. You may need to tweak them a bit.
An import part is setting the source data types – as everything defaults to String. For the Id we want to change this to an Int32, and the DOB want’s to be changed to a DateTime. Datetimes are particulay hard work – and you often need to specifiy the format, so to the right of DateTime there’s a double down arrow – click that for more options. In the format box set your date time format – for me that’s dd/MM/yyyy.
Now Click Publish all so save it.
You would normally ‘trigger’ the run, but first just click ‘Debug’.
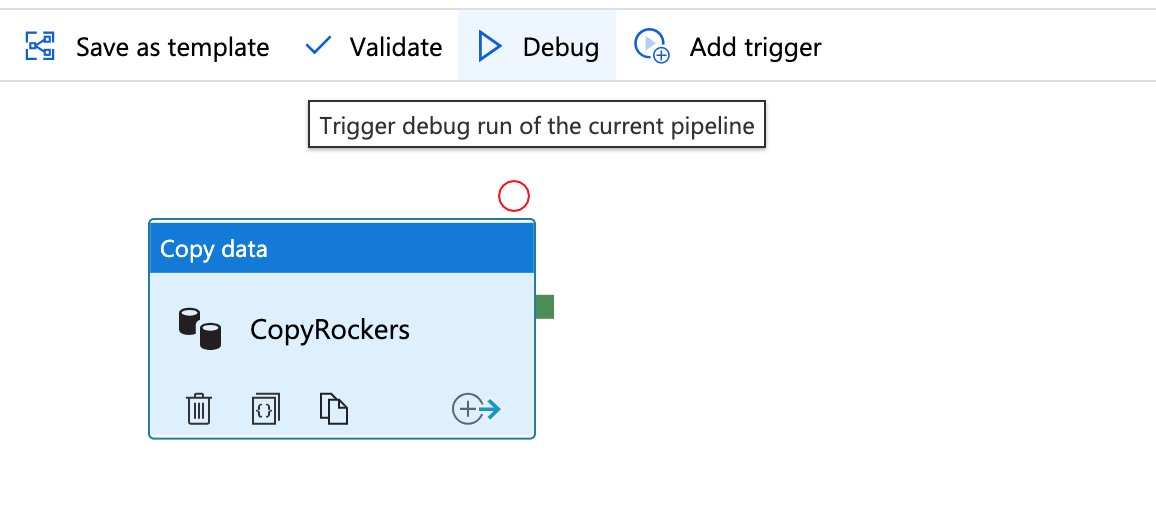
This will run the import – and if all goes well, you’ll get a success. If not, the output window will help you investigate why it’s failed.
Finally, let’s create a trigger.
Go to Triggers – New/Edit, then in the next window click the drop down and select +New.
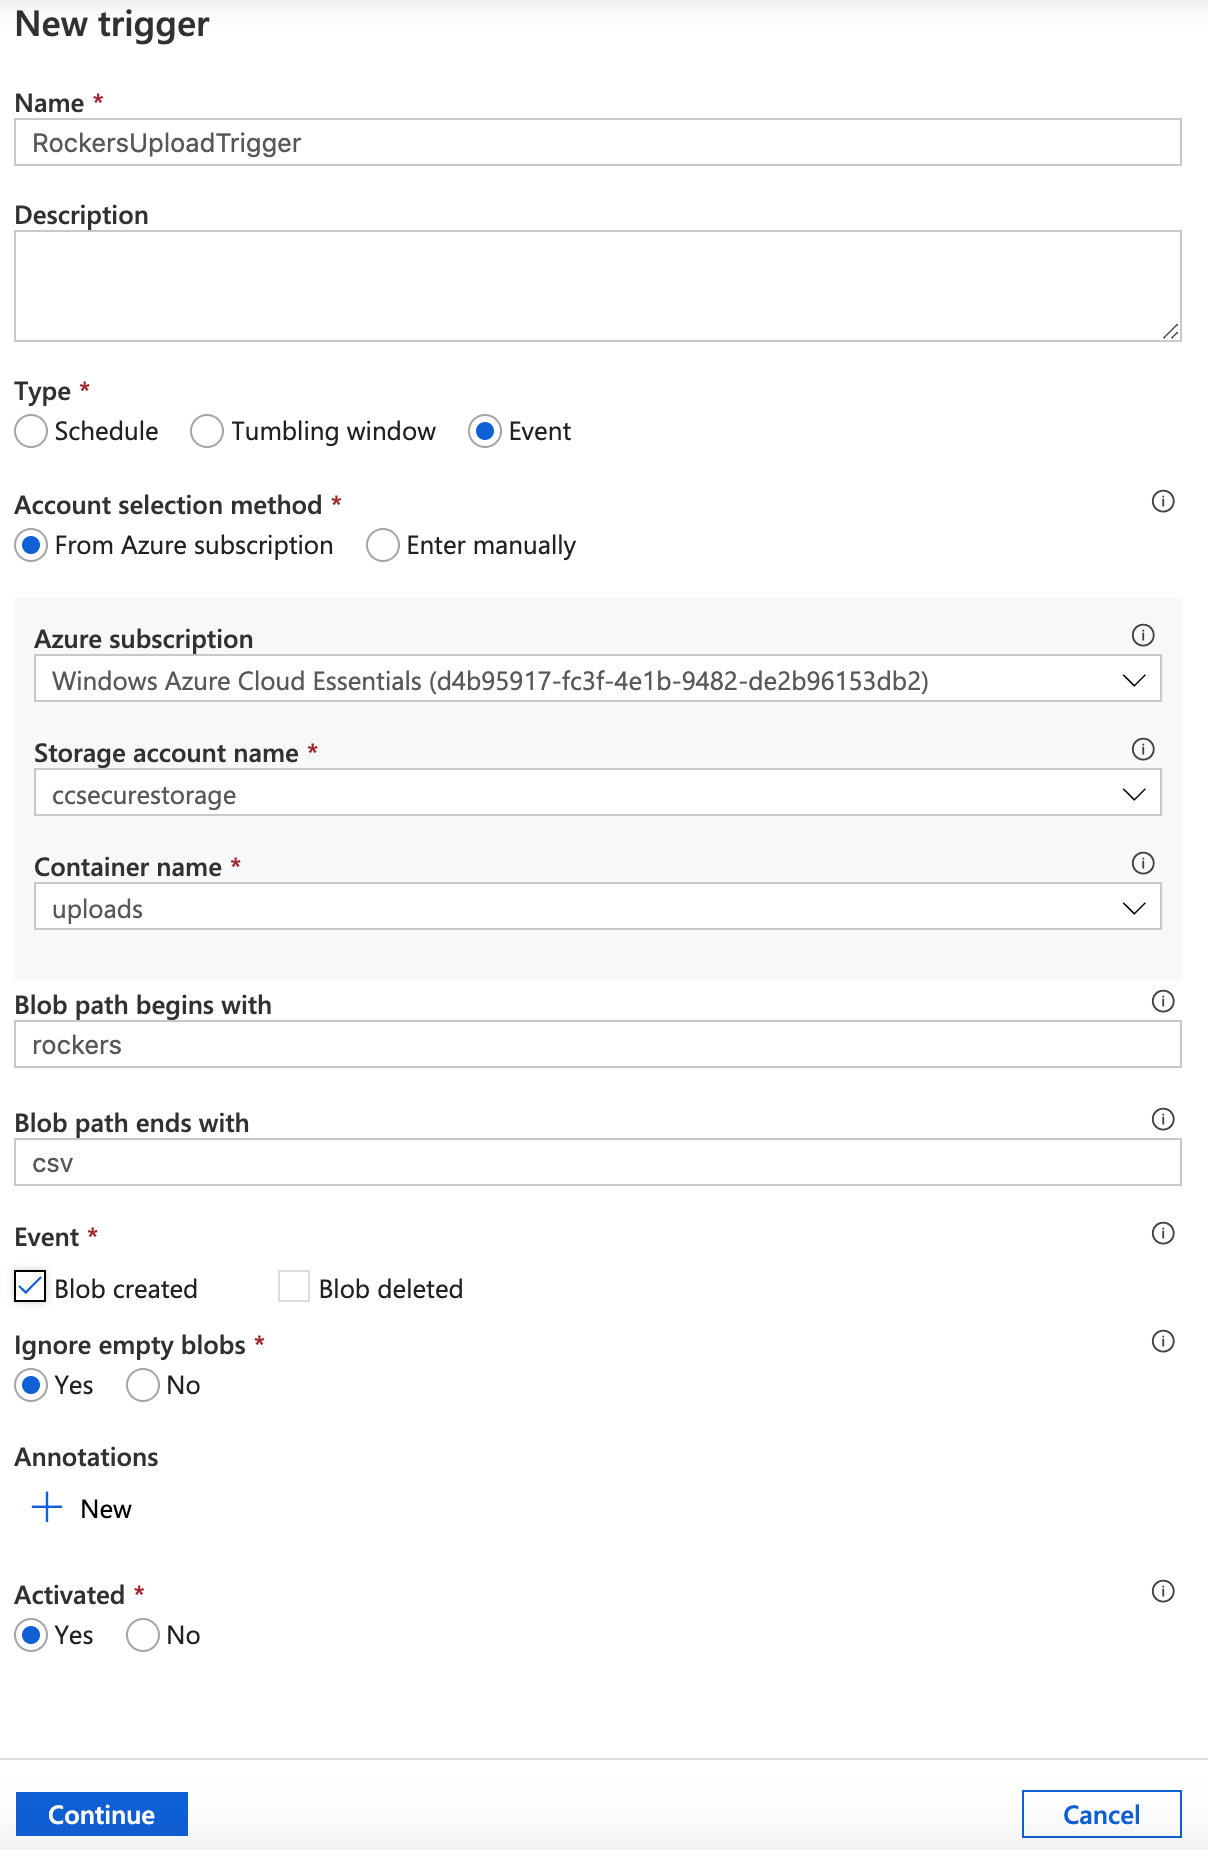
Call our trigger – RockersUploadTrigger.
We want to set the trigger so that everytime a rockers csv is uploaded it runs the import.
Set the following:
Type : Event
Azure Subscription : Your subscription
Storage account name : Select you storage account
Container Name: your uploads container
Next we’ll tell it that whenever we upload a file that starts with ‘rockers’ and ends in ‘csv’ – in other words this wil triger when we upload rockers1.csv or rockers2.csv etc. However, because our pipeline is set to specifically import the file rockers.csv – this will actually only work properly if we always upload the file as rockers.csv.
Finally set the Event to Blob created.
Click continue.
A data preview screen will show that your existing rockers.csv file would be a match. Click Continue. You’ll then be prompted to enter any paramerts (we don’t have any) that you need to publish your changes – click OK.
Then click publish all.
Now, go to SQL Studio Manager and query the Rockers table – you should see the original data.
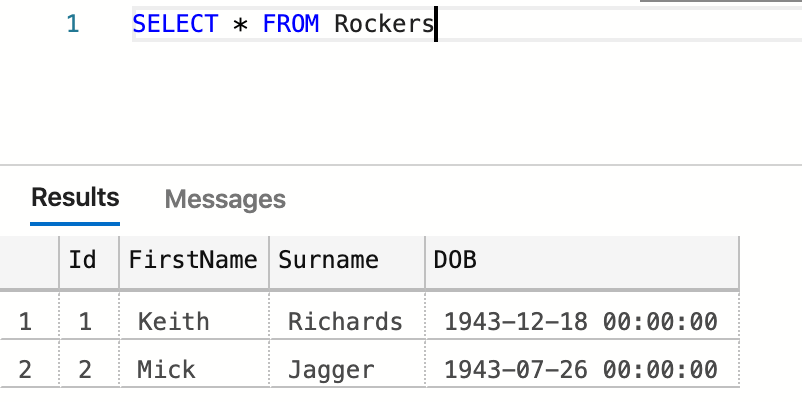
Now edit your CSV file with the following data;
Id,FirstName,Surname,DOB
Save the file as rockers.csv again, and then re-upload it to your storage account.
Now switch back to your Data Factory, and down the left hand side you will see a Monitor option – click that.
That will show us a list of runs, and if any fail a reason why they failed.
If we re-query our table in SQL we will now see the additional records.
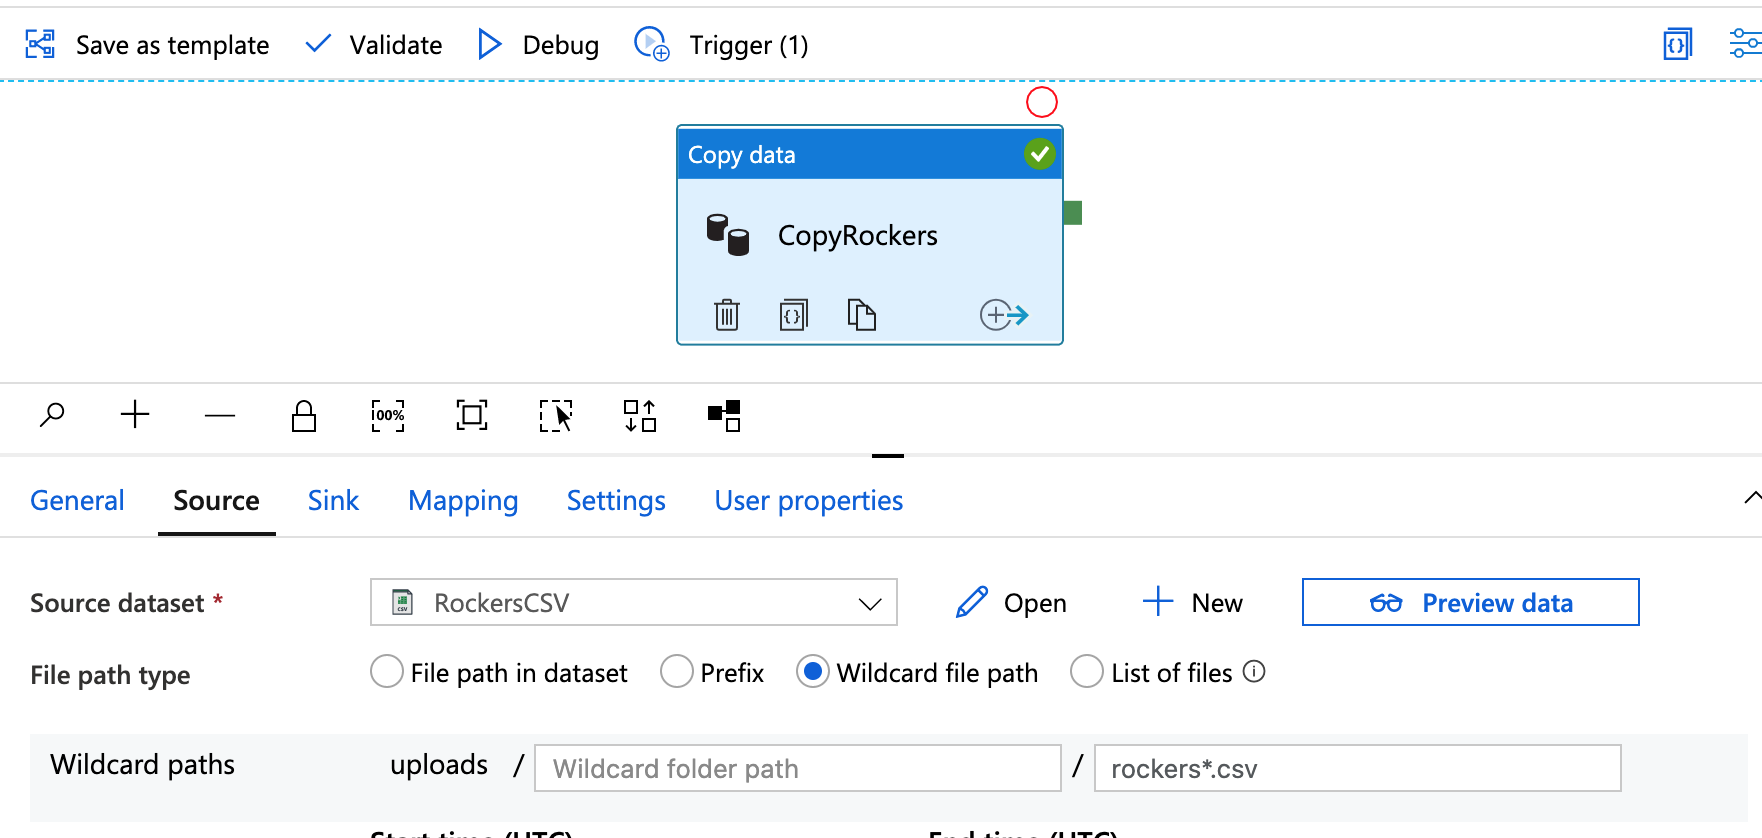
The final change I am going to make is to set the import file as a wild card – as mentioned earlier, so far the pipeline is expecting a file called rockers.csv, so let’s change this so that we can upload, for example, rockers2.csv.
Go back to Author and then to our copy pipeline and edit the source.
Change the File path type from ‘File path in dataset’ to Wildcard file path, leave the wildcard folder path empty and change the wildcard file name to rockers*.csv.
Now delete any existing files in the storage account, and upload a new file called rockers2.csv with the following contents;
Id,FirstName,Surname,DOB
And upload that instead.
Wait a couple of minutes then check the Monitor to ensure the job ran OK, and re-query the table to confirm the new data.
Data Factory is a much easier way to ingest data from CSV files to data stores – which is a common practice for many organisations.
Although much of this can be done within SQL itself, using ADF enables you to create repeatable, automatic pipelines in a secure manner. And of course the Data Copy option is the simplest of it’s abilities – ADF provides a lot of power for much more complex transformations and data movements.
If you’d like to learn more about Azure gaining a Certification is the best way - check out my article on boosting your career with the Azure Solutions Expert Certification here.